Light-O-Rama Tutorial
Top  Previous  Next


lorhld  

Overview:  
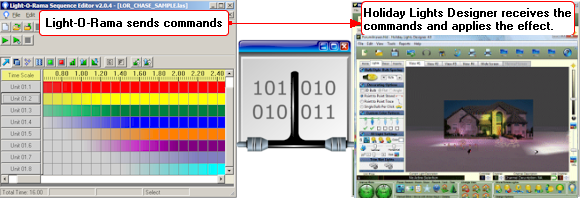
Light-O-Rama (LOR) and Holiday Lights Designer (HLD) can be connected between two PC's over a network, or on the same PC. Once connected and configured, HLD acts as a visualiser for LOR. A sequence is played on LOR and the commands are sent to HLD. HLD receives the commands and instructs the virtual lights in the project to mimic the light sequence. It's an easy way to preview, plan and design the best sequences possible at minimal cost and effort.  
 
clip0330  
1.Setting up a Light-O-Rama connection     
 
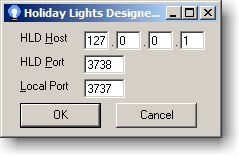
Light-O-Rama and Holiday Lights Designer connect easily via PC data ports using an IP address and port number. Think of IP addresses as the street address of an apartment building, and the port number as the number of a particular apartment within that building. Ports create a virtual data connection that can be used by programs to exchange data. Light-O-Rama and Holiday Lights Designer can be running on the same computer. In this case the IP address is typically entered as 127.0.0.1.  

1.1 Configuring the Light-O-Rama connection settings.  
 
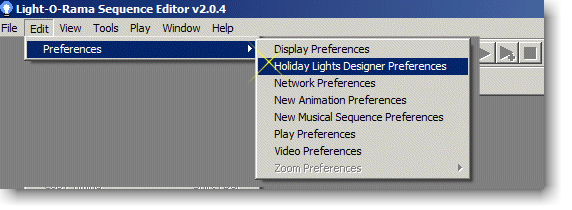
Start the Light-O-Rama sequence editor. Choose Holiday Lights Designer Preferences from the "Edit" menu.  
 
clip033223  
 
In our tutorial we are using the same computer to run both Light-O-Rama and Holiday Lights Designer. We enter the local computer's IP address of 127.0.0.1. We also have two port numbers to assign. The HLD Port number tells Light-O-Rama which port Holiday Lights Designer will use to receive commands. Port 3738 is the default. We do not recommend changing this setting unless you are sure the port number you want to use is available. Many port numbers are reserved for other uses. Visit Computer Port Assignments on the web for more information about reserved ports numbers.

The second port number is called "Local Port". This is the port that Light-O-Rama will use to receive data from Holiday Lights Designer.

   Note: The HLD Port number always needs to be the same one you choose in the Holiday Lights Designer port configuration. More on that later in the tutorial.
 
clip033422  
 
It is recommended that you just accept the default settings if running both LOR and HLD on the same computer.  
 
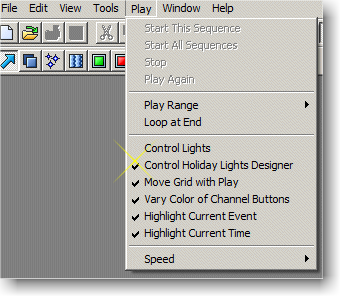
Note: Ensure you have "Control Holiday Lights Designer" checked in the "Play" menu. If not, the commands won't be sent to Holiday Lights Designer.  
 
clip03351  
 
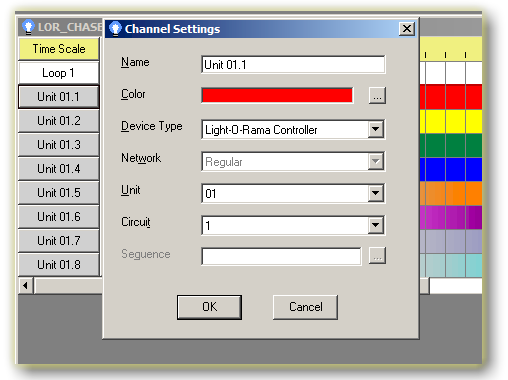
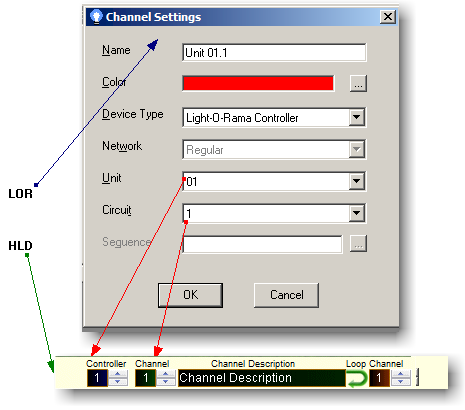
When setting up your sequences, make sure you set the device type to "Light-O-Rama Controller".  
 
image18  
 
 
clip0338  
1.2 Configuring the Holiday Lights Designer connection settings.  
 
Start Holiday Lights Designer and open or start a new project. You cannot connect to Light-O-Rama until you have opened a saved project or started a new one and loaded a target house image. Once that is complete, click on the LOR icon to open the settings.

clip0492  
 
The settings box will open. A default port number of "3738" will show. You can type in any port number you need. We are using the defaults in our tutorial so all you need to do is click the "Connect" button.

   NOTE: It is strongly recommended that you start the LOR sequence editor before hitting the HLD "connect" button.
clip0495  
 
clip0493  
 
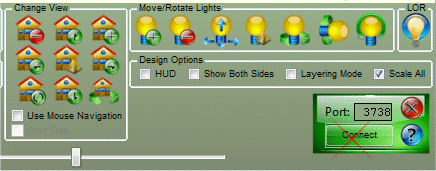
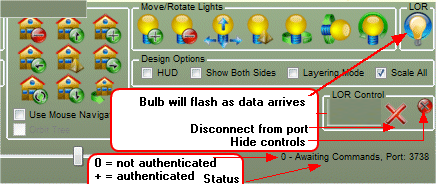
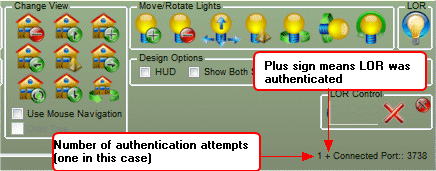
If the connection is successful, you will see a message indicating so.  
 
clip0494  
 
 
clip0496  
 
That's it!, the connection has been established. When you are ready to close the connection, click on the clip0337  
 
 
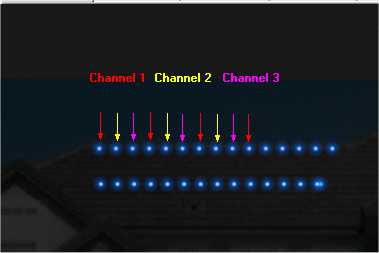
1.3 Mapping the Light-O-Rama Units and Channels to Holiday Lights Designer.  
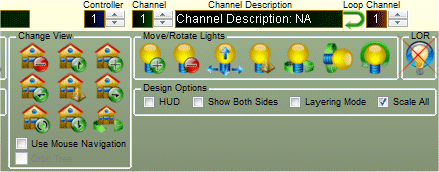
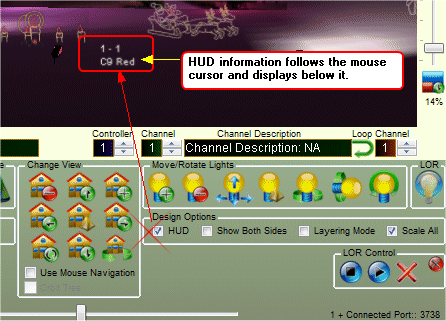
 
Mapping is simply the process of mapping lights and decorations in Holiday Lights Designer to the mappings in your Light-O-Rama project. Holiday Lights Designer has "Controllers" and "Channels". In Light-O-Rama those are called "Unit's" and Circuits".

Simply put, as you add lights and decorations to your Holiday Lights Designer project, they are automatically assigned the current "Controller" and "Channel" displayed in the Unit and Circuit fields below the design canvas. Clicking on the arrows will change the active selection for these. These can be modified later if necessary. The "Circuit Description" is an editable field where you can assign a meaningful name to that particular circuit. The circuit description is saved on a per project basis.
 
image182  
 
TIP:  
Use the "HUD" to remind you of the current Light Controller and Channel selection:  
clip0497  
 
clip0339
Loop channels allow you to automatically assign different circuits to each bulb as you lay down a strand of bulbs. The resulting effect is similar to putting down three strands of lights at once. This saves time when building a chase sequence for example.

clip0366  
clip0365  


www.holidaysoft.com